
Downloading and installing evScheduler for MacOS X (10.14 or greater):
1) Download the file to your computer: click here (2.0.1)
2) When the download finishes, you will have the following file on your desktop, or wherever you chose to save it:
evScheduler-OSX-....dmg
(the icon will look something like this:
)
Note: Depending on your browser, system, and settings, steps 3 and 4 may happen automatically
3) Double click on this image file - it will mount a virtual "disk" on your desktop named:
evScheduler-...
(the icon of this virtual disk will look something like this:
)
4) Double click on the virtual disk icon, and it will open a window similar to this:
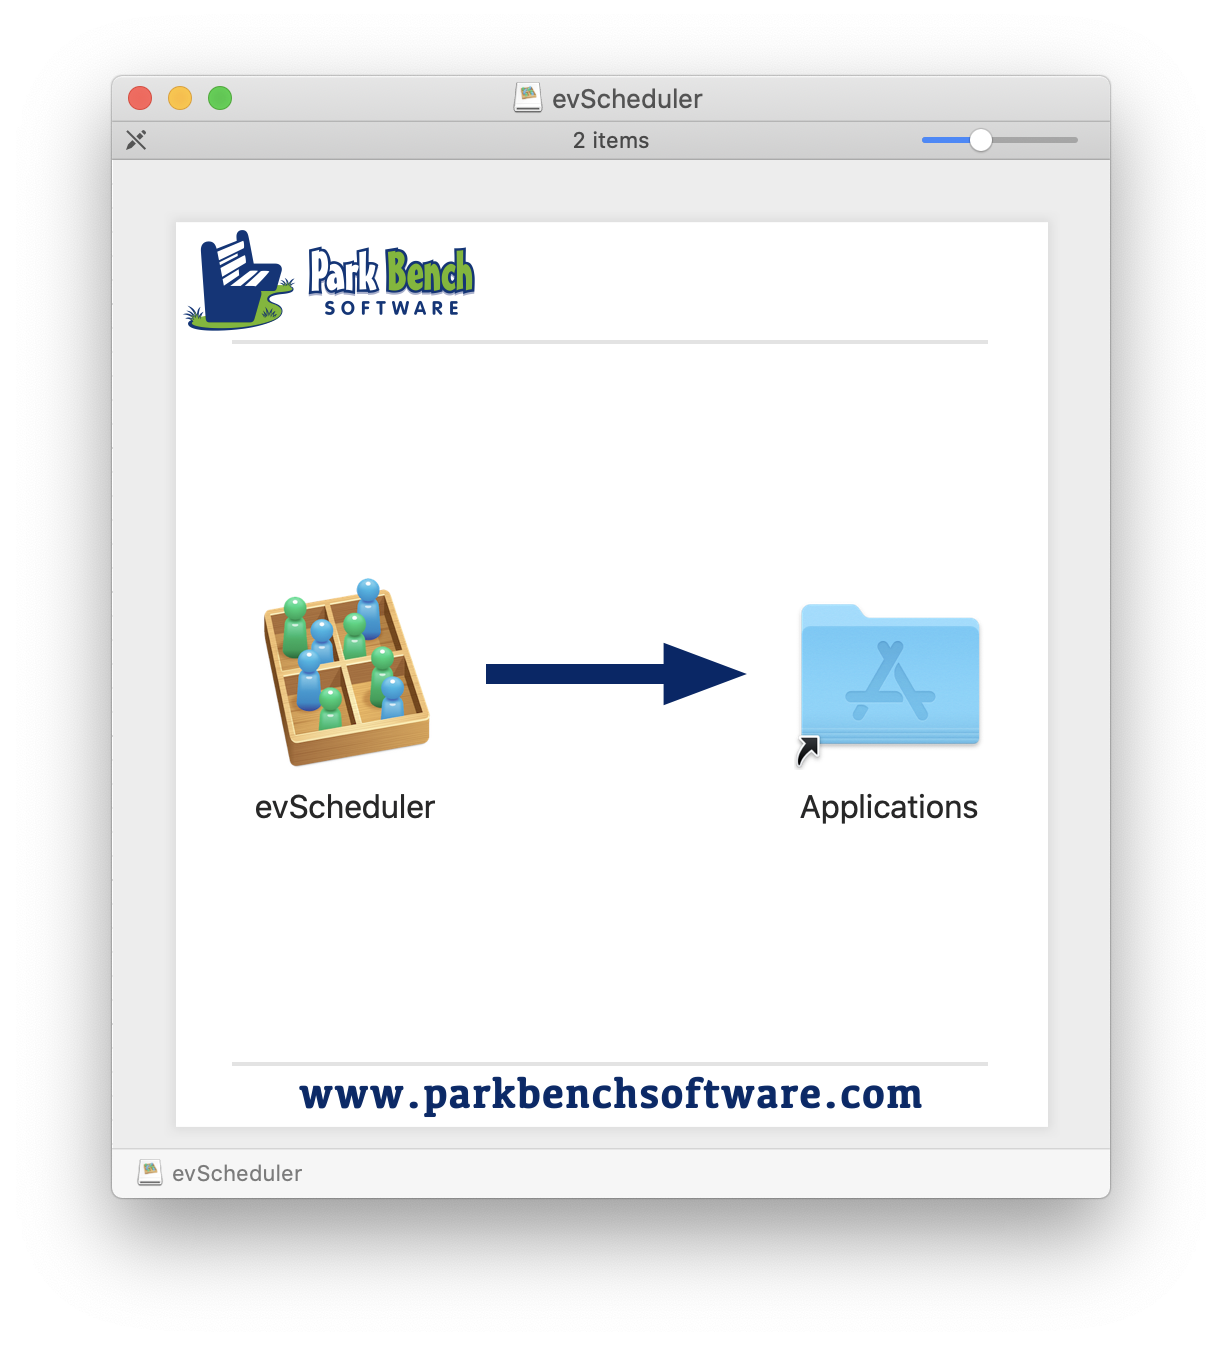
5) Open and review the evScheduler License file.
6) Drag the "evScheduler" icon to the Applications folder on your hard drive, or any other location of your choice.
7) (optional) Drag the evScheduler User Guide to a location of your choice.
8) When done, eject the virtual disk: select it and choose File->Eject
from the menu bar